
Authorize.Net API Integration
This page list of contents:
- Setting up Authorize.Net as a Payment method
- API Login ID
- Transaction Key
- Public Client Key
- Authorize logo when customers are saving their credit card details in the customer portal
- Authorize Logo in Creating a new booking in the customer portal
Authorized.net is a payment gateway service provider based in the United States, that allows merchants to accept electronic check and credit payments, they provide services online, and over the phone.
Click here for more information about this payment software.
Setting up Authorize.Net as a Payment method
For setting the previously mentioned service as a payment method on Octopuspro please follow these steps:
- Login to your Octopuspro Account, click here if you have not.
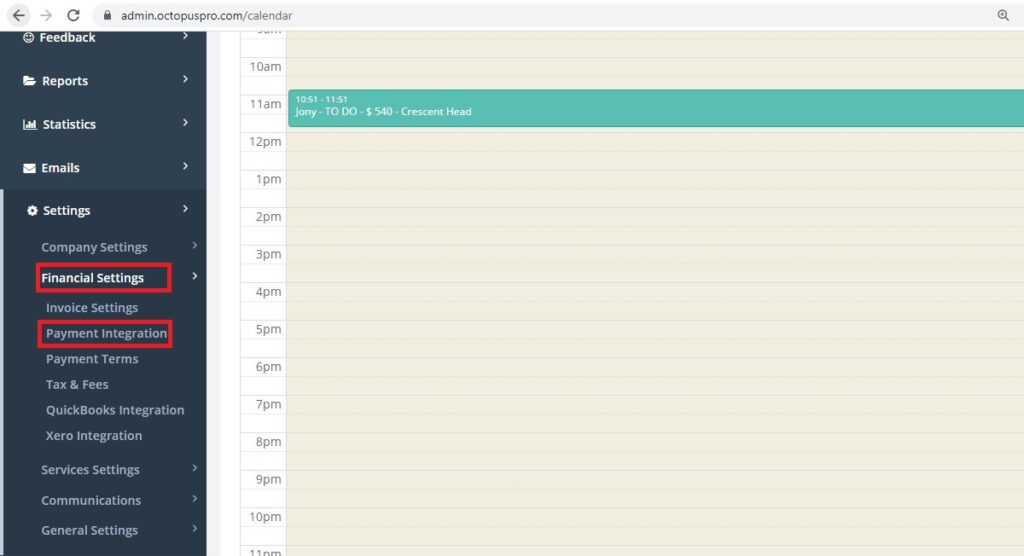
- In the left menu, click on Settings >> Financial Settings >> Payment integration.
- Choose your online payment method.
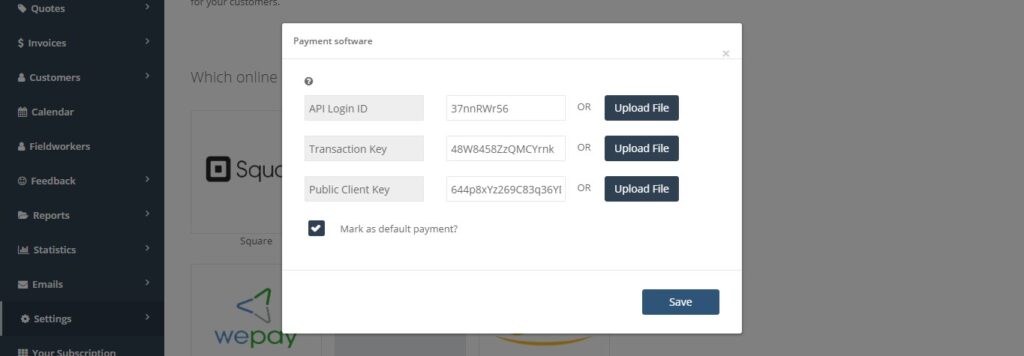
- After you choose your online payment software, a pop-up window will appear as follows:
Note: This payment system requires you to have a merchant account, which is a type of bank account that allows your business to accept payments in multiple ways like debit and credit.
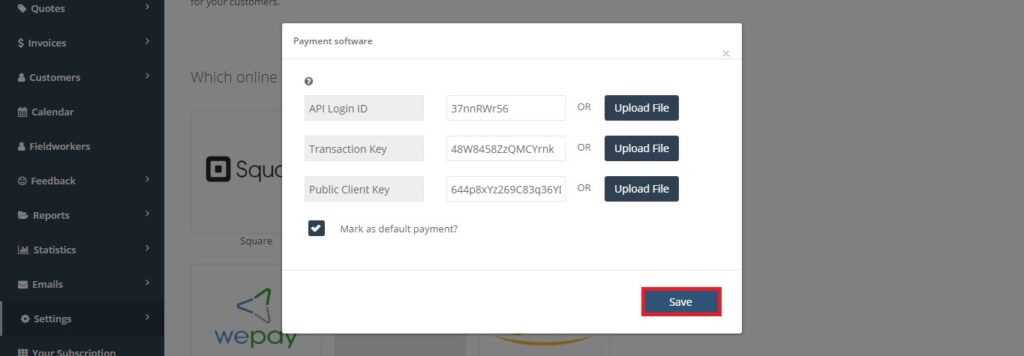
Three keys are needed for setting up your octopus account to accept payments using the Authorize.Net as a payment method:
- API Login ID.
- Transaction Key.
- Public Client Key.
API Login ID
In order to get your keys in general you need to:
- Firstly, log in to your Authorize.Net account, click here if you haven’t logged in yet.
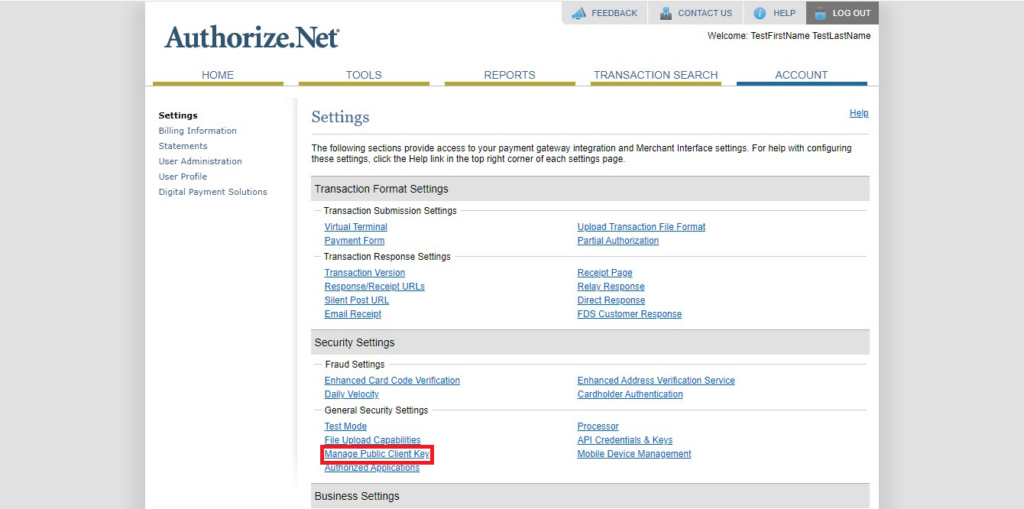
- Secondly, go to the up-right of the page, click on the ACCOUNT tap.
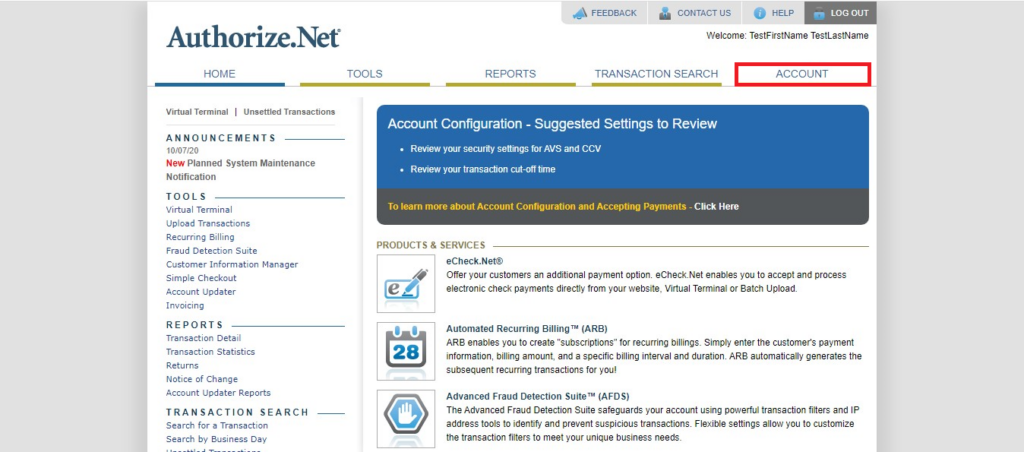
- Now you are in your account setting help page that looks as follows:
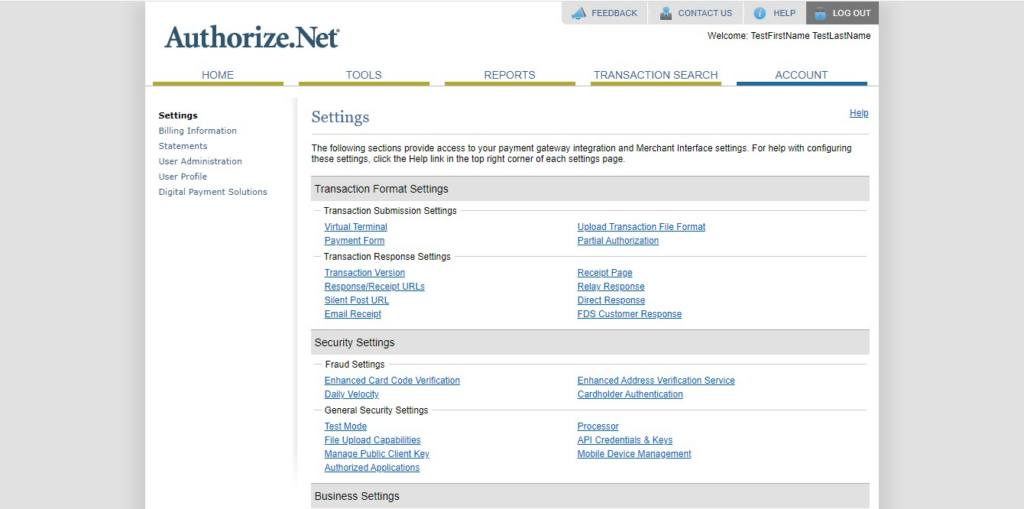
- Click on API Credentials & Keys.
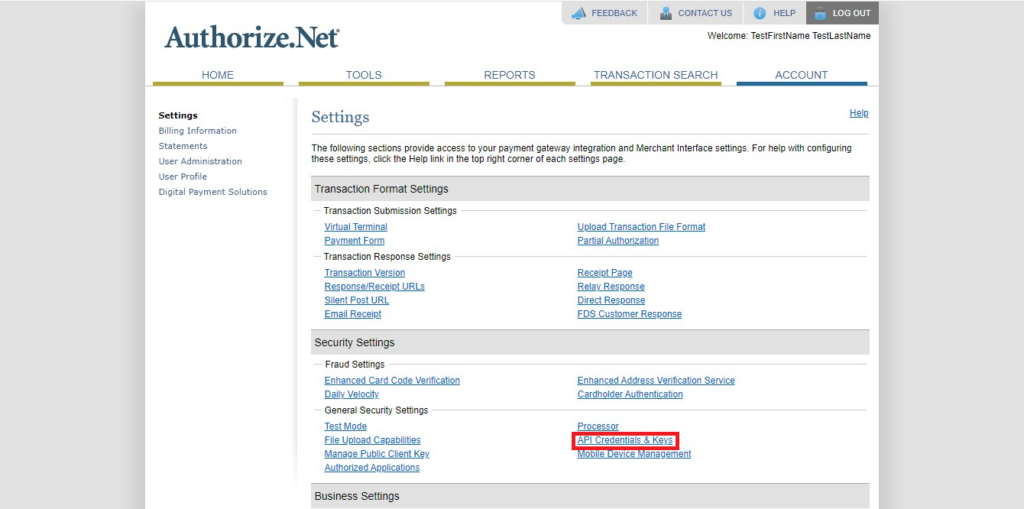
- Your API key will be in the middle of the page where it says API Login ID.

- Copy the key and paste it into the corresponding field in the pop-up previously mentioned.
Transaction Key
As a result of following the previously mentioned steps, from the API Credentials & Keys page, go to the last section of the page that says Create new Key(s).
- Click on New Transaction Key.
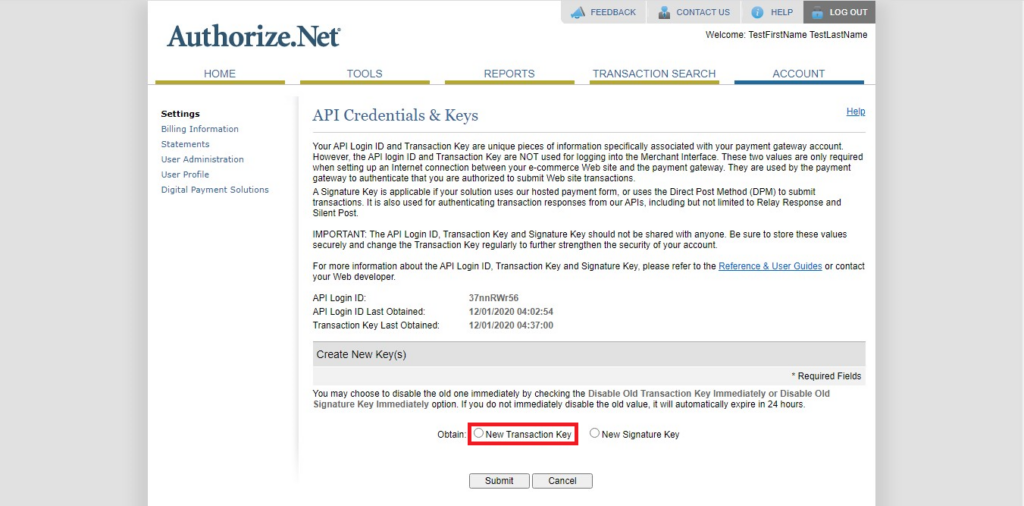
- After that you need to click on Submit .
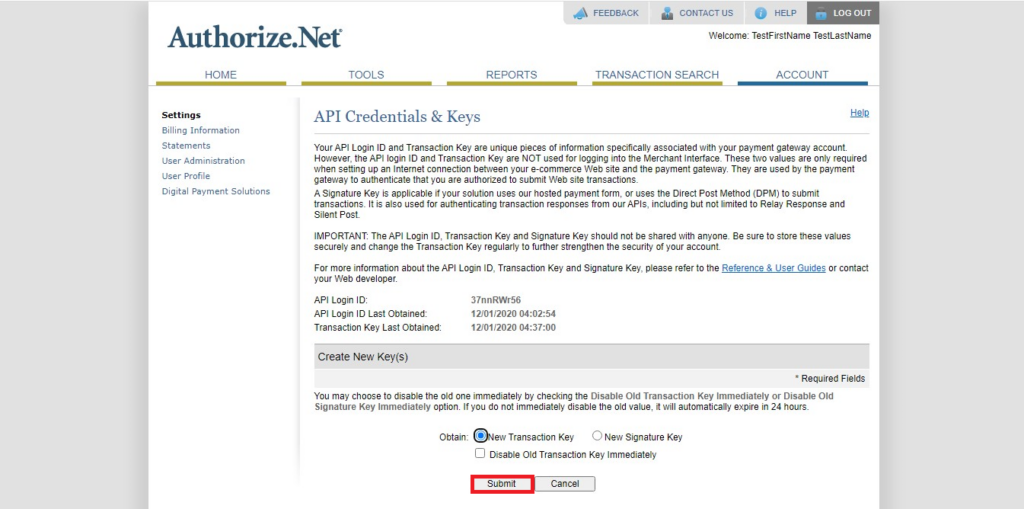
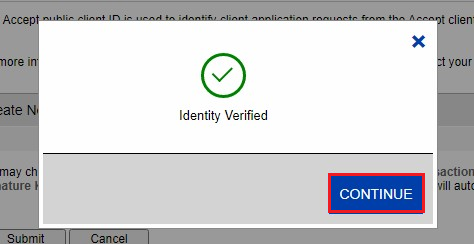
- When you click on Submit you will need to verify your identity. Therefore a popup will appear asking you to enter a PIN code that is sent to your email.
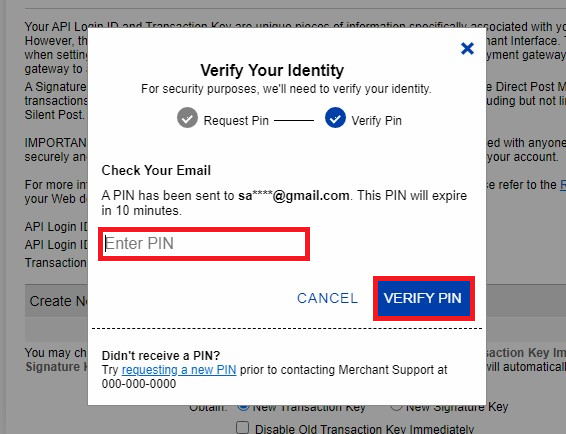
- Then, a message will show ensuring that your identity has been verified, press ok.
- Consequently, you will be directed to the page of the newly generated transaction key. So, you need to copy the key by clicking on the Copy to Clipboard button.

- Then paste it in the corresponding Octopuspro Athorize.Net API integration setting pop-up.
Public Client Key
The last key you need is the Public Key, you need to open the account setting page, Look at the previous steps in order to direct you to this page.
- From the setting page Click on Manage Public Client Key.
- Now you are on the Public client key page, the key that we need is on this page as seen in the picture below:
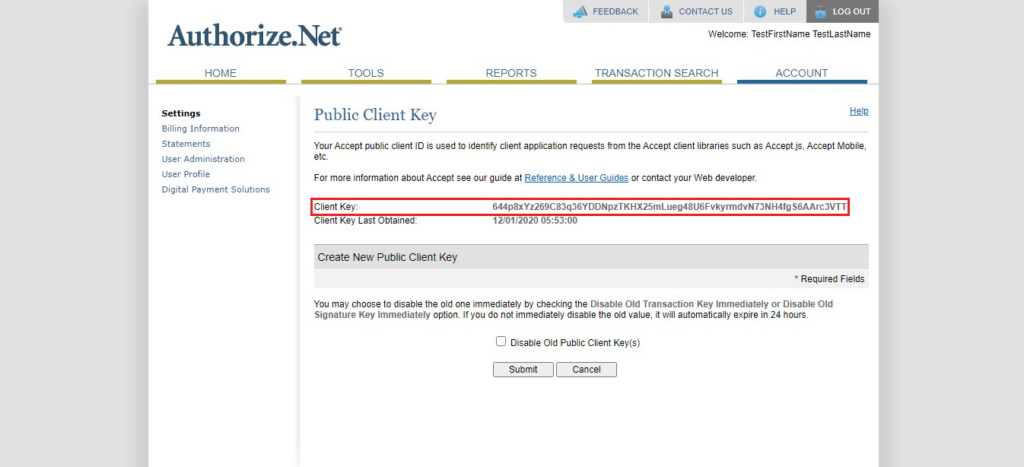
Copy that key and paste it into the Octopuspro API pop-up that we explained before. Make sure that you paste it in the right field.
- Make sure that you click on the Save button to avoid any information lost.
Authorize.Net as an API integration expectations in our system:
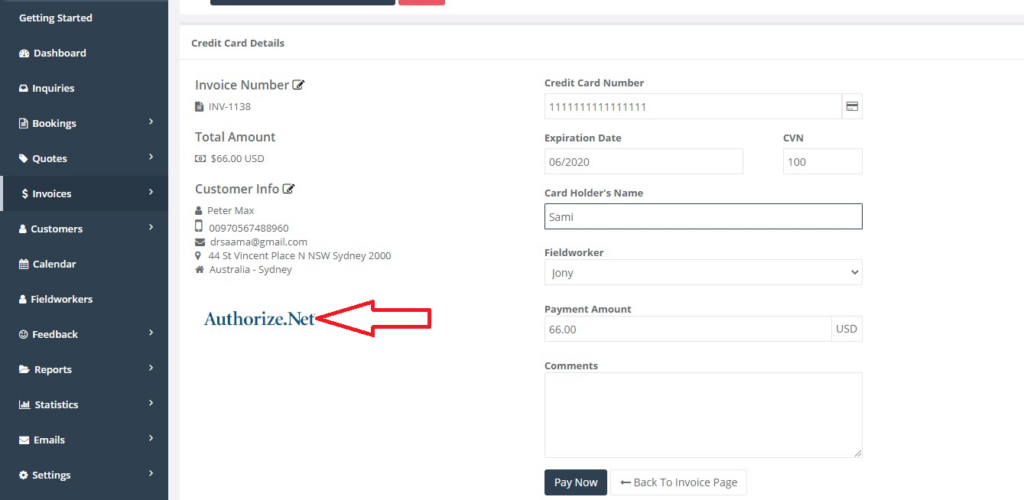
- The API integration software logo will appear in Add a new payment to your invoices as an admin.
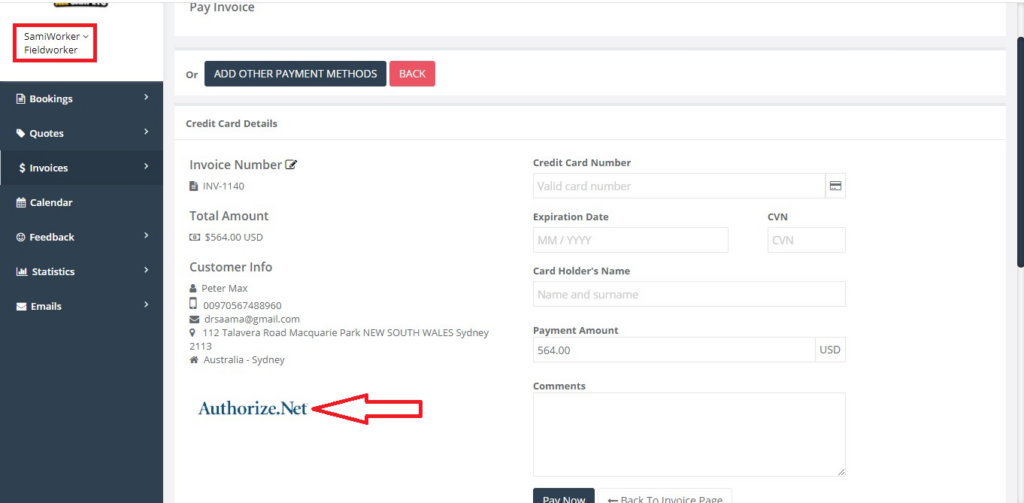
- The API integration software logo will appear in Add a new payment to your invoices as a fieldworker.
Authorize logo when customers are saving their credit card details in the customer portal
As the customer logs in to his activated account in the customer portal so they can save their credit card information the customer will be able to use the saved data in the future while creating new bookings. In order for the customer to save his credit card number he needs to Follow the steps bellow:
- From My booking page go to “Payments”, in this page a list of all the previous payments made by the customer will appear, in order to save/edit credit card information click on payment methods at the top of the list

In ordar to add a new card click on “+ Add a new payment method”

Customers will be redirected to the following page, and the Authorize logo will appear for them as follows:

Authorize Logo in Creating a new booking in the customer portal
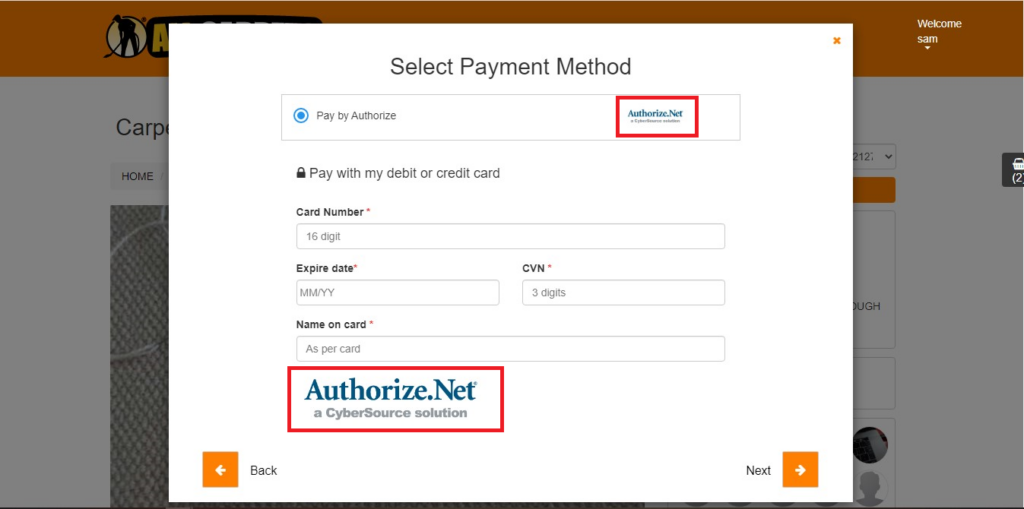
Already registered customers and guest customers will see the Authorize logo in the process of creating a new booking, the logo will appear in Select Payment Method. When the customers are able to make credit card transactions in the customer portal, “Authorize” logo will appear in Pay by card tap as follows:-
For more information please visit Octopuspro user guide, and subscribe to our youtube channel.