Create custom fields for services
A custom field is a piece of information which determines the options of a field. Some fields need to have options to be shown for the user about the field; like questions to be asked to give more specific information about the field. Custom fields can be used when creating your services. They are used to give more details about the company’s services. Some services need some other options to be connected with. For example, your company provides tile cleaning as a service, but on this same service, you need to ask your customers about surface type (ceramic tile, porcelain tile, sandstone tile, etc.) and other things. You can add surface type as a custom field to tile cleaning service. So when the customer chooses this service, the custom field of surface type will be shown for him/her to choose from. It is important to link the service with its custom fields so whenever a customer selects a service, its custom fields will directly appear for the customer Assign a custom field to a service. Custom fields can have more than one value as surface type here which have different values (ceramic, porcelain, etc.) Add custom field values. That’s why there are different types of custom fields. Some fields will require a drop down box for the user to select an option whereas others require a text field for the user to type in information. When you add a custom field, you need to determine the type of this field. Types of custom fields are: date picker, time picker, text box (multiline), text field (one line), (+/-) button, toggle (yes or no), dropdown, radio button, button group, list, and checkbox. General overview. To create a new custom field:
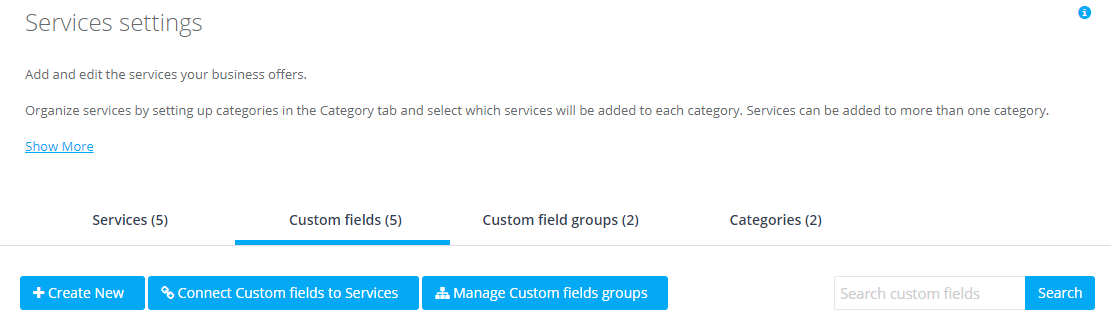
- Go to Settings.
- Select Services Settings.
- Click Custom fields.
- Click Create New.
5. Enter the custom field information in the required fields.
 6. In Field label: write the name of your custom field (the option or the question you want to add to a service).
7. In Field ID: write another name for this custom field. This name should be unique and it is only visible for you as an admin. This field needs to be filled with a unique information that is not used before and that is what makes it different form the previous field. In Field label, you can write a name that is used in other services, For example, surface type can be used as a custom field for two services: tile cleaning and sealing tiles, but in Field ID for each, you have to write different names that are only shown for you to be able to distinguish between both.
8. In Helper text: you can add additional information about your custom field that is visible to the user when they tap the “info” icon. If you leave this filed blank, the “info” icon will be hidden.
9. In Active: choose If this custom field is active or not used any more.
10. In Hidden from customer: choose if you want this custom field to be hidden from the customer or not. If your custom field doesn’t require any selection form the customer part and it’s only for the admin, you can hide it from the customer; but if this custom field has to be answered by the customer, then you should not make it hidden from the customer. And when making a new booking and the customer chooses a service that this custom field is linked to, the custom field will be shown for the customer to make his/her selection.
11. In Hidden from inquiry widget: choose if you want this custom field to be hidden from the inquiry widget or not.
12. In Mandatory: choose if you want answering this custom field to be mandatory when making a booking and choosing the service it is assigned to or not.
13. In Searchable: you can make the values of this custom field searchable. By making a custom field searchable, you will be able to search for the values of this custom field in the quick search and advanced search. This will however make your search slower, so it is recommended to use this feature only if you need to be able to search for the values of the custom field, otherwise keep this turned off for most custom fields.
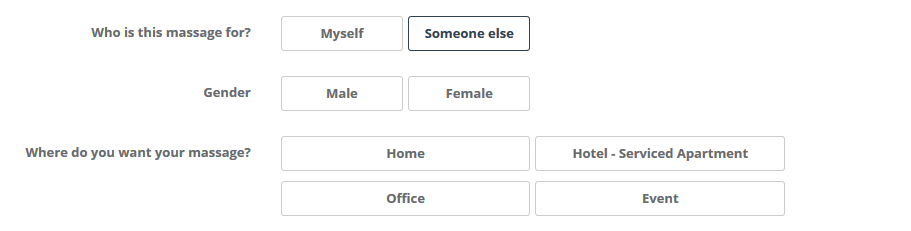
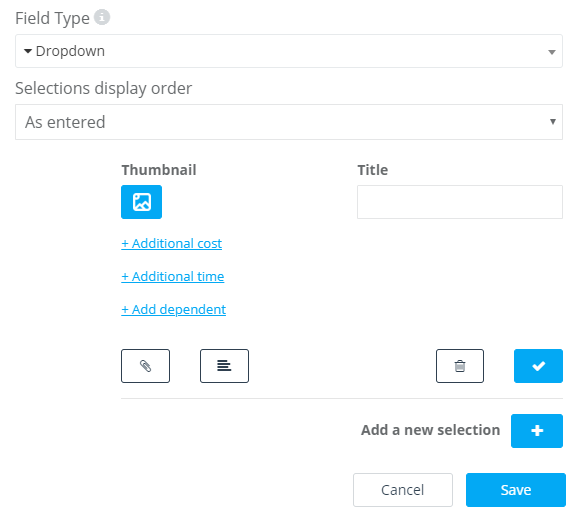
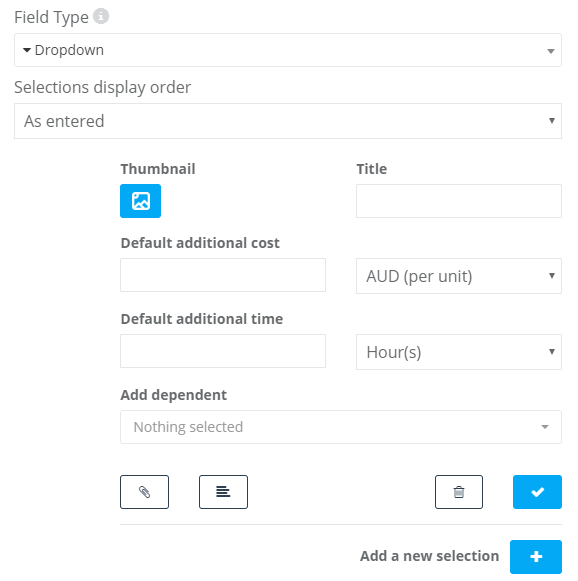
14. In Field Type: select the custom field type using the drop down box. If the type you choose is Dropdown, Radio button, Button group, List, or Checkbox, then you have to enter the values that will be shown for the user to choose from. Write the value name in Title. If you want choosing this specific value to affect the service original price, then click on Additional cost to add the additional cost per unit in Default additional cost to be applied when calculating the price. If there is additional time to be added for this value, click on Additional time and add it in Default additional time. If there is another custom field that its visibility depends on choosing this value, you can link this value to that custom field by clicking on Add dependent and choose the wanted custom field so if the customer chooses this value as an answer, then the custom field that depends on this answer will appear for the customer to answer too. For example, you can add “who is this service for?” as a custom field and add these values for the customer to choose from: (myself, or someone else). If the customer chooses “someone else”, you can link that value to another custom filed to ask about the gender. The following screen shot can clarify that.

 Then add all the other values the same way by pressing Add a new selection.
15. Press Save.
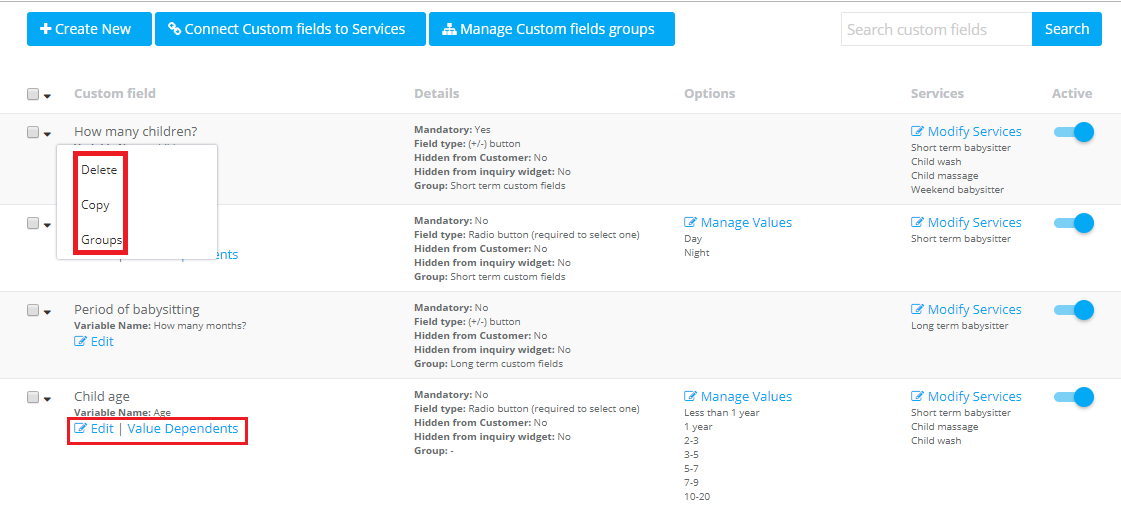
After creating your custom fields, you can edit them, copy them, add value dependents to them, or add them to a group.