Inquiry widget
The Inquiry Widget is a form that can be linked to your website, through which customers can easily send in inquiries. The inquiries will automatically appear in the Inquiries section in your OctopusPro account, which makes them easy to follow-up.
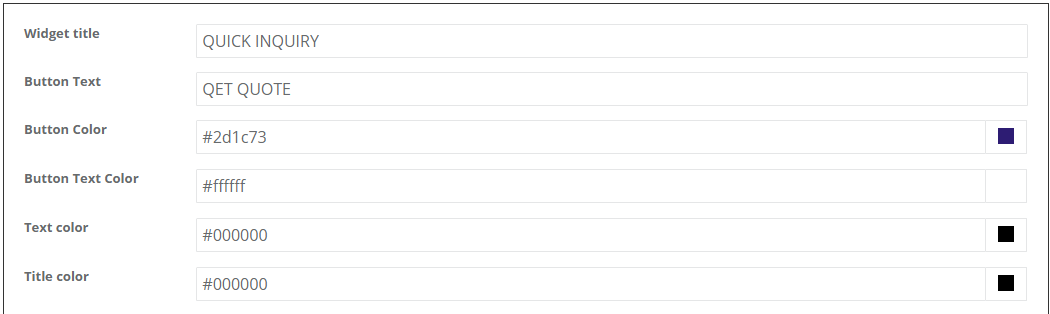
To set it up, go to the Inquiry Widget section under Inquiries in the Communication Settings. You can select the colors and text for the form.
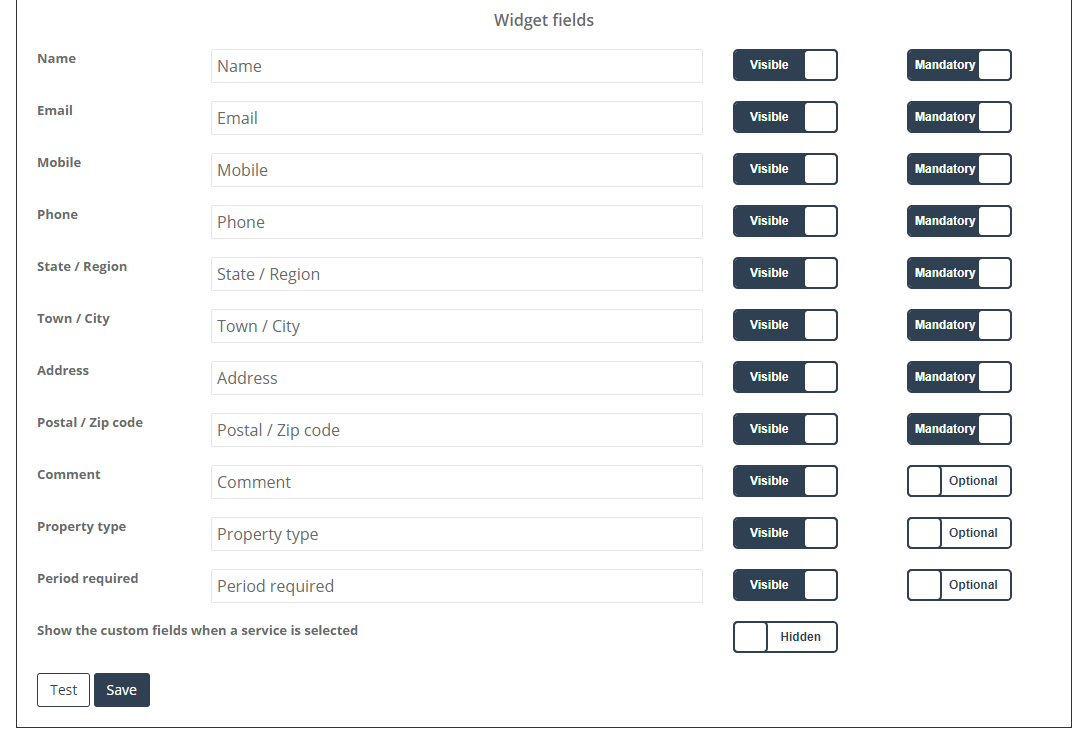
You can also choose the widget fields you want to be shown in the inquiry widget by choosing “visible” for fields you want to appear or “hidden” for fields you don’t want to appear.
To change the name of these fields, you can:
- Write the new name in enter new label name. For example, write First name instead of Name.
- Then press save
As you make changes, you can see them actualize in the ‘Preview’ section below.
In addition, you can choose whether these fields to be mandatory or optional for your customers to fill.
 If you want the custom fields of your services to be shown when selecting the service, you can choose either “visible” or “hidden” as well.

If you don’t want all the custom fields of a specific service to be shown, you can customize that when creating or editing a new custom field> Hidden from inquiry widget.
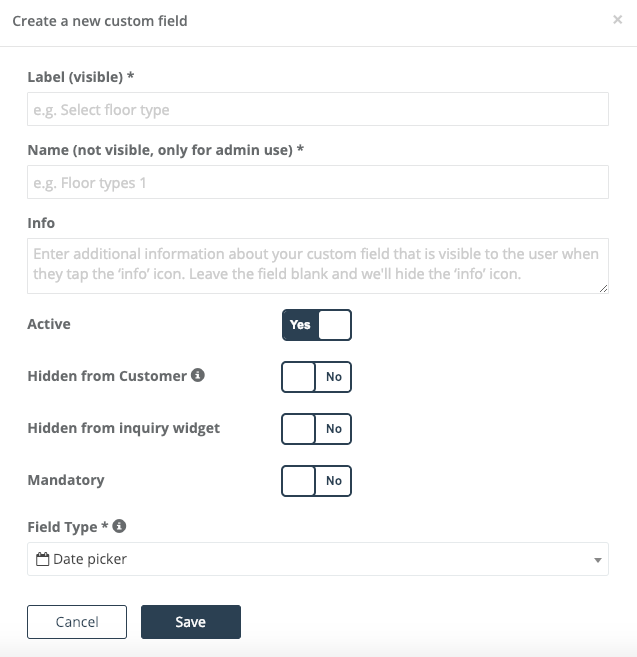
If you want to add new fields in the inquiry widget, you can add them as custom fields. You can link custom fields that already exist or you can create new ones then link them to the inquiry widget to be shown as another field in the inquiry widget.
If the custom field is already existing and you only want to link it to the inquiry widget, you can go to settings>communications>inquiries>sources & options>Assign custom field.
Otherwise, you will create it first by going to settings>services settings>custom fields>create custom field.
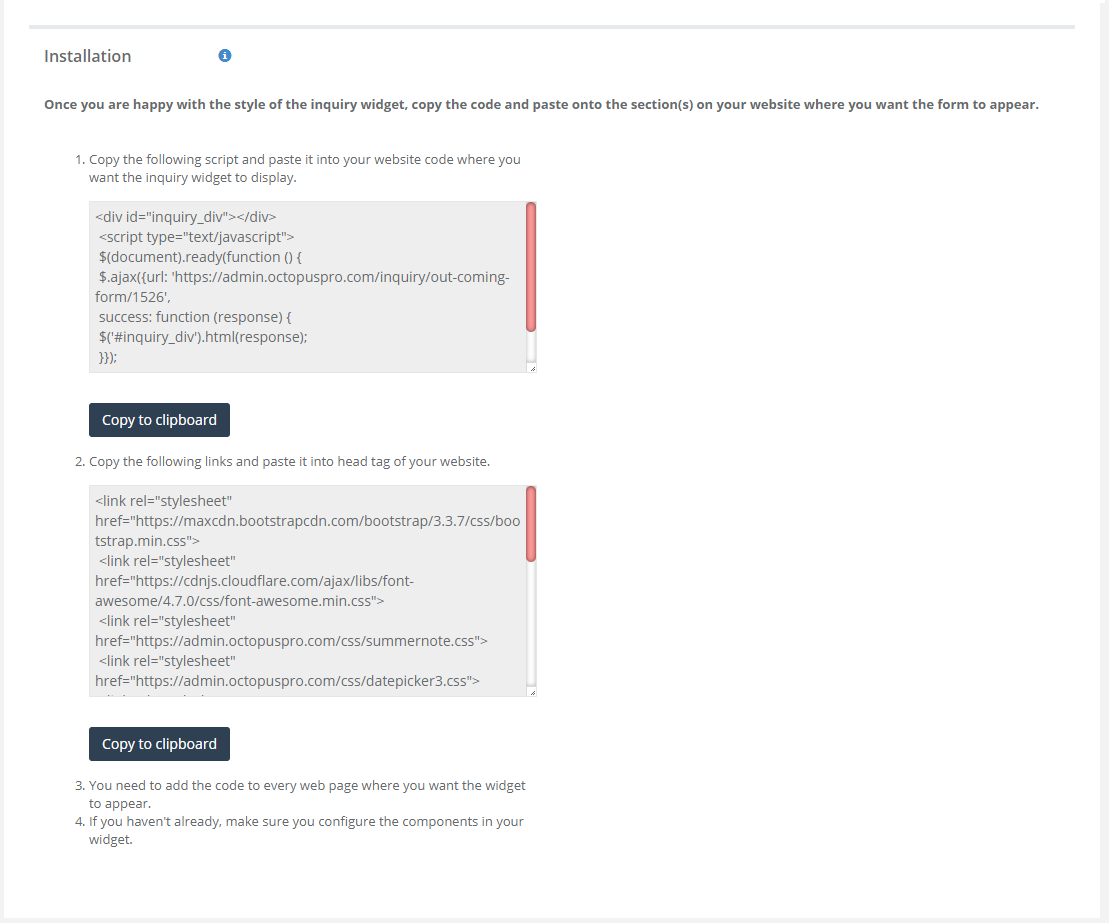
Finally, you will need to copy the piece of code into the section on your website where you want the widget to appear.