
Managing Invoice Due Dates
OctopusPro provides a robust invoice management system that helps you maintain a steady cash flow and enhances the punctuality of customer payments. Setting due dates for invoices is a key feature in this process, which not only fosters a disciplined payment culture but also aids in your company’s financial planning and forecasting.
The core features of this tool include:
- Invoice-Level Customization: OctopusPro allows you to set unique due dates for individual invoices, providing the flexibility to cater to specific circumstances or unique payment terms.
- Customer-Level Customization: You can also define a default due date for each customer. This feature is particularly beneficial for businesses with long-term clients and can help nurture business relationships by accommodating the payment habits of each client.
- Company-Level Customization: Establish a company-wide default due date, ensuring consistency across all invoices and improving overall payment collection efficiency.
- Multiple Due Date Options: Choose from a range of due date options, including the booking start date, booking completion date, or a specific day of the month, giving you more control over your invoicing process.
- Custom Due Date Creation: If the default options do not meet your needs, OctopusPro gives you the freedom to create customized due dates.
- Bulk Updating of Due Dates: Streamline your invoicing by updating due dates in bulk, either at the company level or the customer level.
The benefits of these features are multifold. They allow for better cash flow management, reduce the risk of delayed payments, and facilitate a more efficient invoicing process. By implementing appropriate due dates, you can increase your business’s financial health, cultivate customer trust, and maintain a professional image.
Follow the step-by-step instructions in this guide to optimize the use of OctopusPro’s features. Whether you’re setting a specific due date for a single invoice, updating the default due date in a customer profile, or modifying the default due date in your company settings, this guide will equip you with the knowledge and confidence to do so. We also provide a comprehensive explanation of the various options available for setting invoice due dates, as well as the process for customizing a new due date.
With this guide, you can take full advantage of OctopusPro’s capabilities to set and manage invoice due dates effectively, bringing simplicity and efficiency to your billing process. Let’s get started!
List of contents:
- Why are invoice due dates essential?
- What is the difference between invoice date and due date?
- Determining Due Date levels for invoices
- What do these levels refer to?
- The effect of different due dates settings
- How to set a due date for a specific invoice
- What are the available options for the invoice due dates?
- How to customize a new due date
Understanding Invoice Due Dates
An invoice due date represents the final date by which payment must be made on an invoice before it is deemed overdue. This crucial date is typically included in the invoice sent to customers, ensuring they are aware of the deadline for payment. If payment is not received by the due date, the invoice is considered overdue, potentially leading to additional consequences.
Why are invoice due dates essential?
Setting due dates on invoices is crucial for several reasons. Primarily, it motivates customers to submit payment within a specific timeframe. Although it is possible to negotiate a later payment date, it is generally expected that a customer will pay within 30 days or upon completion of the provided service. In some industries, it is also customary to request a deposit against the invoice before work commences.
Including the due date on an invoice, which serves as the official financial document requesting payment, eliminates any ambiguity regarding when payment is expected, thereby preventing disputes arising from a lack of knowledge about the payment deadline. Furthermore, organizing your invoices by due date allows you to monitor expected payments and identify overdue invoices efficiently.
What is the difference between invoice date and invoice due date?
The invoice date refers to the date on which an invoice is created, whereas the due date denotes the deadline for payment against the invoice.
Determining Due Date levels for invoices
There are several options for setting due dates for invoices: at the company level, customer level, or invoice level.
Understanding Due Date Levels
-
Company level: Setting the due date at the company level means that all future invoices generated by your company will reflect the specified due date, unless overridden by a customer-specific or invoice-specific due date.
-
Customer level: You can also establish a default due date for each customer, which will apply to all invoices issued to that customer. However, if a unique due date is manually set for a particular invoice, the customer-level due date will be overridden.
-
Invoice level: Specifying a due date at the invoice level allows for customization of payment terms for individual invoices. This due date takes precedence over any default due dates set at the customer or company level and will not affect other invoices.
The effect of different due dates settings
To better comprehend the interplay between different due date settings, consider the following hierarchy:
- Invoice level due dates take priority and will supersede any customer or company-level due dates.
- Customer level due dates are applied in the absence of an invoice-specific due date, and they override company-level due dates.
- Company level due dates are the default setting and apply to all future invoices, except when overridden by customer or invoice-level due dates.
Modifying Invoice Due Dates: A Step-by-Step Guide
Altering the due date for a specific invoice
To update the due date for an individual invoice, you need to change it directly, ensuring it remains independent of pre-existing due dates at the company or customer level. For instance, if your company has a 15-day due date and customer “John Smith” has a 7-day due date, but you want to set a 2-day due date for a specific invoice created on October 10, the updated due date will be October 12. This change will not be influenced by the default company or customer due dates.
Updating the default due date in a customer profile
To change the due date for all of a customer’s invoices, you can update the default due date in their profile. This alteration will apply to future invoices only, unless you choose “Yes” when prompted by an automatic message after saving the changes. By selecting “Yes,” you will also update the due dates for existing invoices that follow the company and customer-level due date settings, but not those with invoice-level due dates. For instance, if you set a 10-day due date for customer “Y,” all their future invoices will have a 10-day due date. If you want to apply the same due date to their existing invoices, select “Yes” when prompted.
Modifying the default due date in your company settings
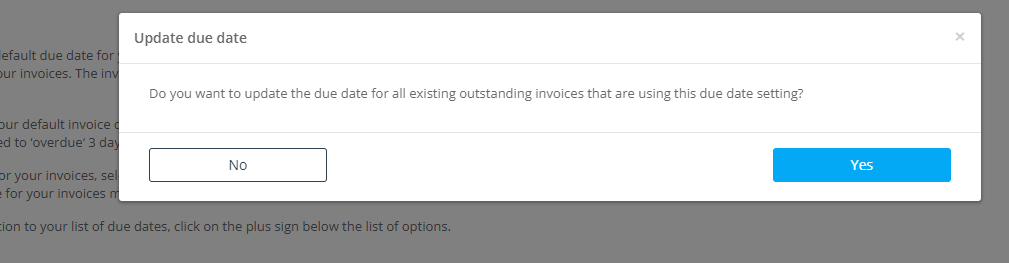
You can set a default due date for all invoices in your company by adjusting your Financial Settings. This change will affect only future invoices unless you select “Yes” when prompted by an automatic message, which asks if you want to update all existing outstanding invoices. By choosing “Yes,” the new due date will apply to future invoices without customer-specific or invoice-specific due dates and to existing invoices with company-level due date settings only. Invoices with customer-level or invoice-level due dates will remain unchanged. For example, if you set a 7-day due date for your company, future invoices without a customer-level or invoice-level due date will have a 7-day due date from the invoice creation date. If you choose “Yes” when prompted, your existing invoices with company-level due dates will be updated to the new 7-day due date.
Let’s check the steps required to set the different due dates on the invoice level, customer level, and company level.
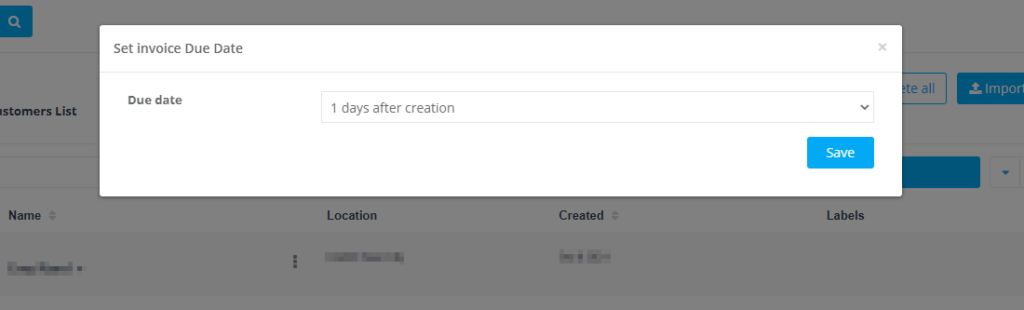
How to set a due date for a specific invoice
From the side menu > Select invoices
Select the type of invoice you wish to view or select All Invoices
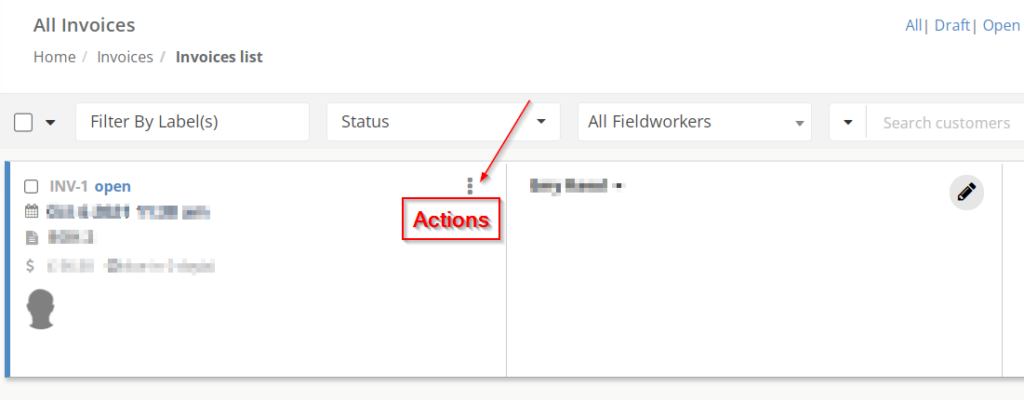
On the invoice overview click Actions
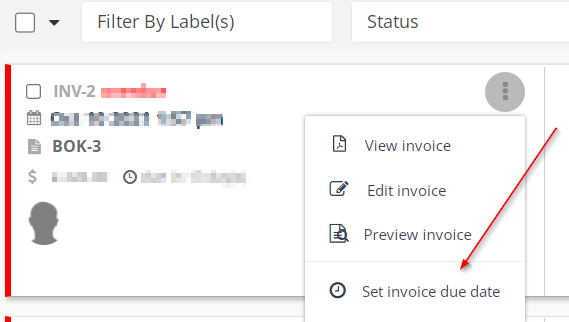
Select Set invoice due date from the popup menu
Select the due date you want to set for the invoice
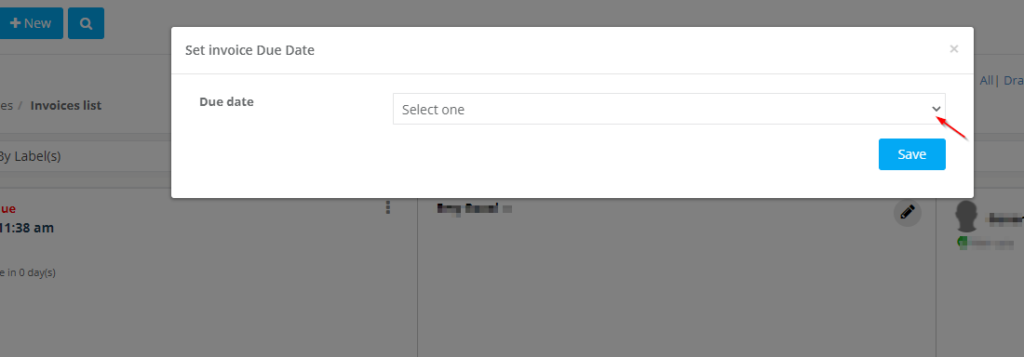
- Please note that you will have an option from the due date dropdown menu to select “Custom due date” where you can add a specific date from the calendar to be the due date for this invoice*
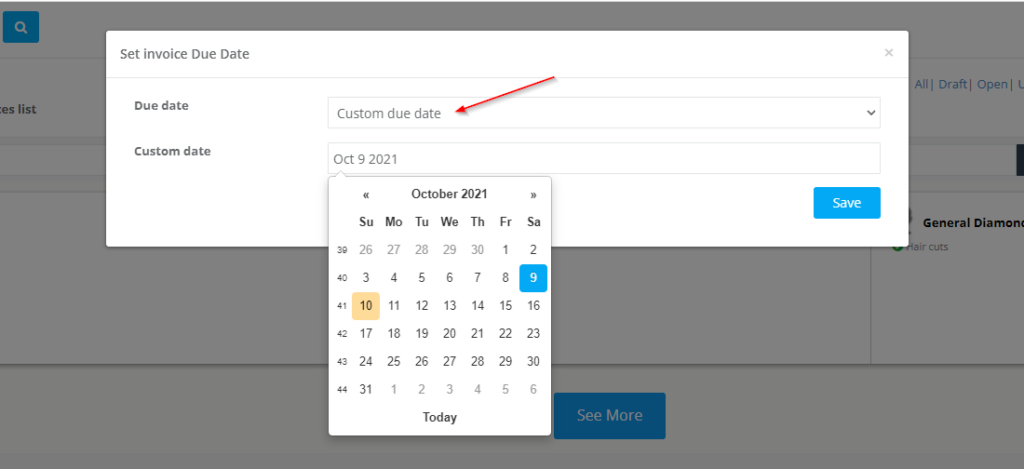
Then click Save.
To set the default due date for a specific customer,please follow the following instructions:
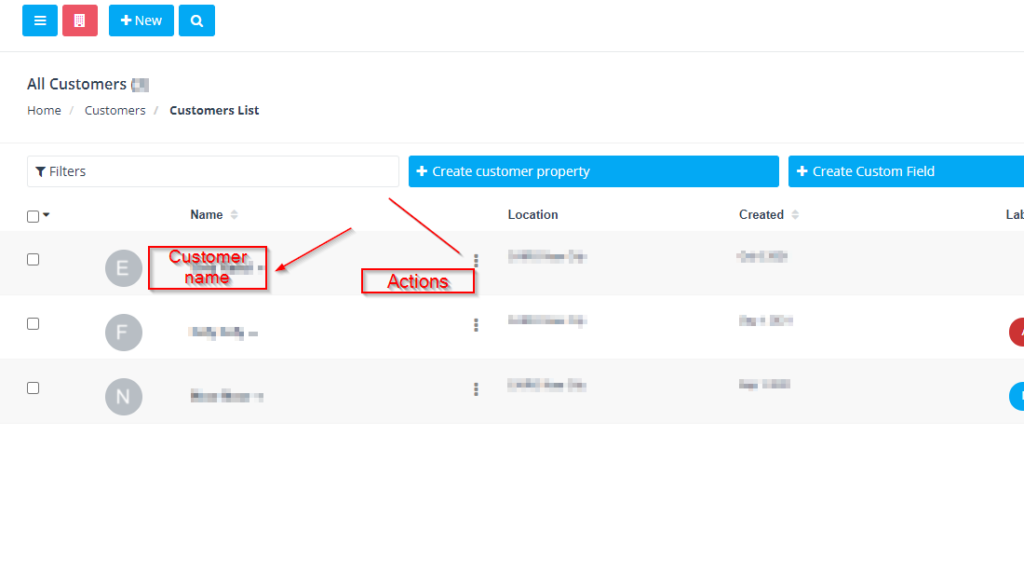
From the side menu > Select Customers
Select All customers to view the customer’s list.
Find the customer you need to set the due date for, and on the customer overview click Actions
Click on the Set invoice due date from the action list, you can also do the same from the customer profile page.
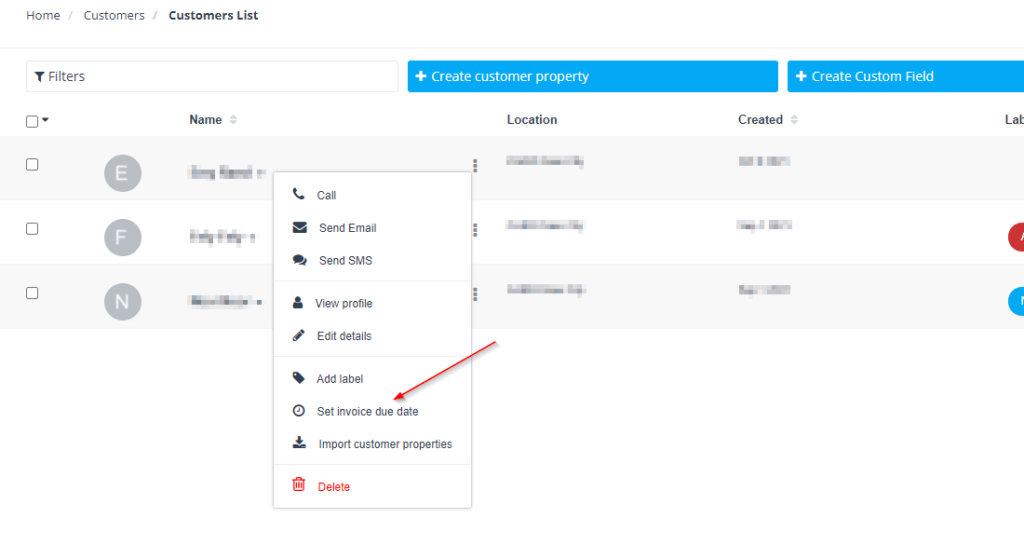
Set the preferred due date from the dropdown menu and click save
Please note that you will only be able to select the due dates from the available options and you won’t have the chance to add a new number of days to be due after, but you can do that from Settings > Financial settings > Payment terms > Add new +
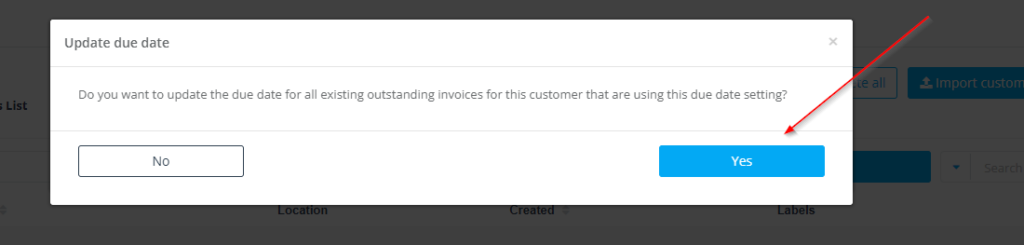
After clicking save, you will get an automated message “Do you want to update the due date for all existing outstanding invoices for this customer that are using this due date setting?”
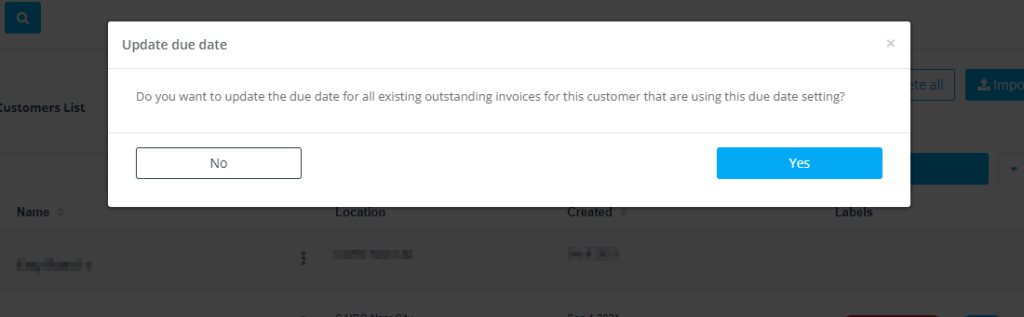
No > The new due date will be applied only to all the future invoices of this customer.
Yes > The new due date will be applied to both the customer’s future invoices and the current invoices that have a company due date or customer due date.
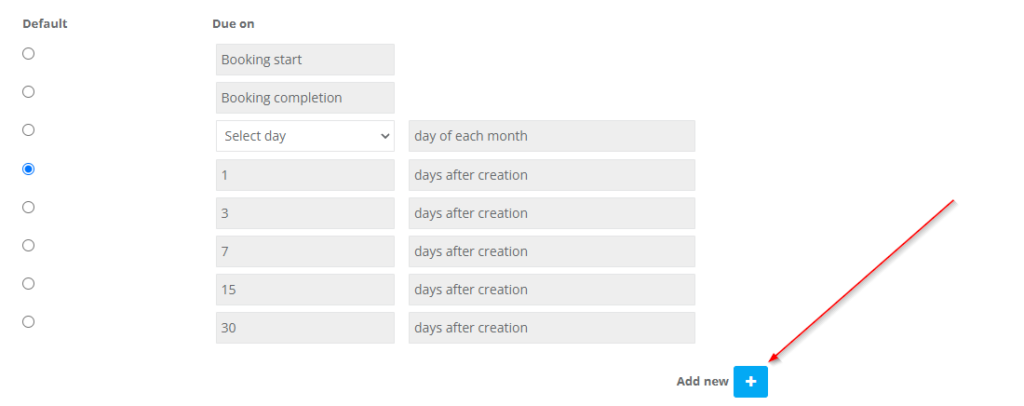
To set the company due date, please follow the following instructions:
From Settings > Select Financial Settings > Payment terms
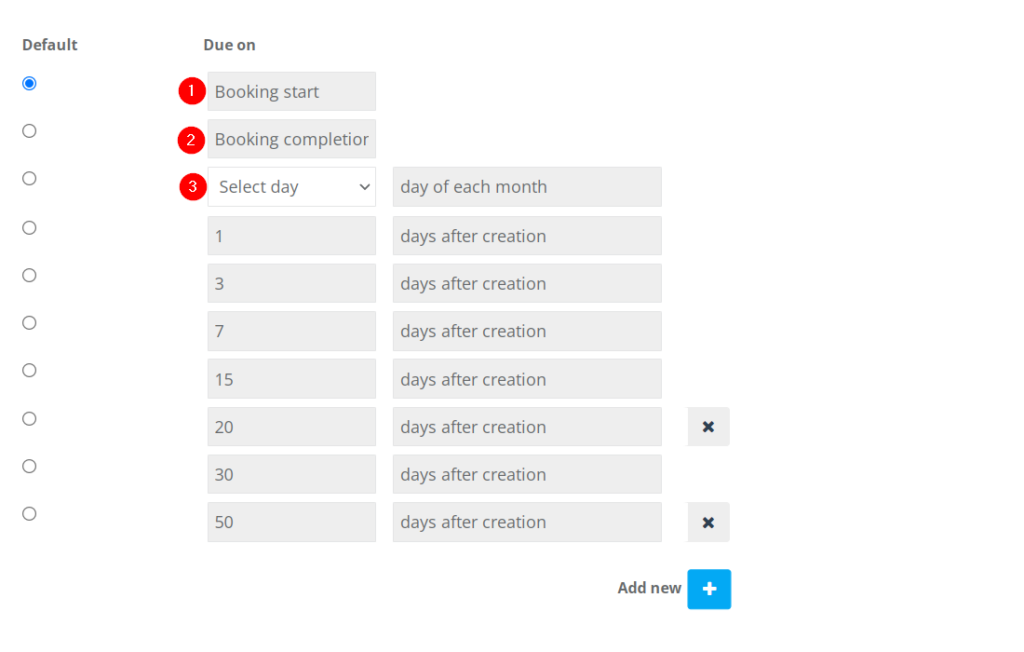
Select the radio button under the “Default” row to match the preferred “Due on” in the next row.
What are the available options for the invoice due dates?
There are various options available for setting invoice due dates, allowing you to customize your payment terms according to your business needs:
-
Booking Start: By selecting this option, you stipulate that invoice payments should be collected when the service commences, based on the first start date in your booking’s scheduled appointments.
-
Booking Completion: With this choice, the customer is expected to make payment after the entire service has been provided and completed. In this scenario, the booking status must be changed to “Completed” before the invoice is due.
-
Select Day: This option allows you to specify a specific day of the month as the due date for invoices. You can choose any day from 1 to 28 in the dropdown menu, and this date will apply to all invoices each month.
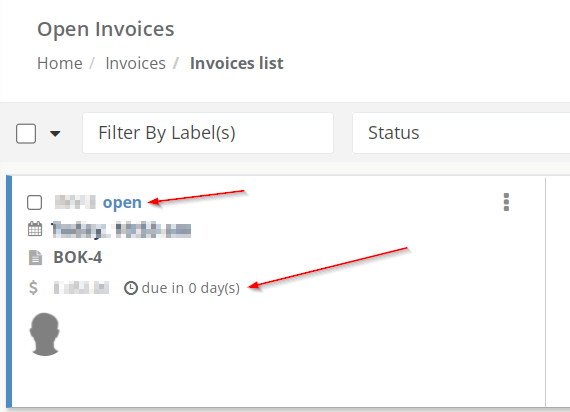
Please note that when selecting “Booking Start” or “Booking Completion” as the company due date, future invoices for customers without a customer-specific due date will be categorized under the “Open Invoices” tab and marked as “due in 0 days.”
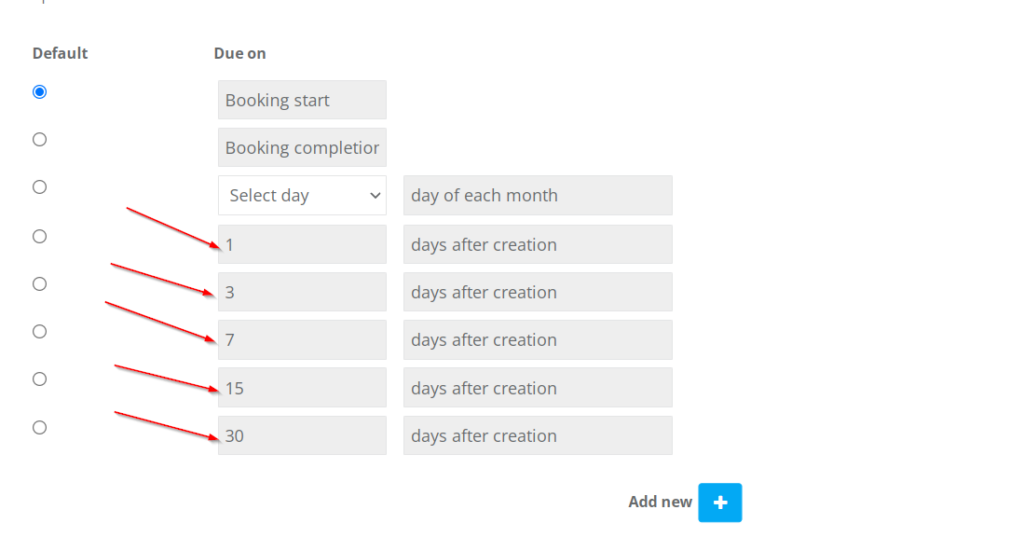
Additionally, there are default options with the numbers “1, 3, 7, 15, 30,” accompanied by a field labeled “Days after creation.” This notation indicates that the selected number of days will be added to the invoice creation date to determine the due date. For example, if an invoice is created on October 6th and the admin selects “3” from the due date options, the invoice due date will be October 9th, as it falls three days after the invoice creation date.
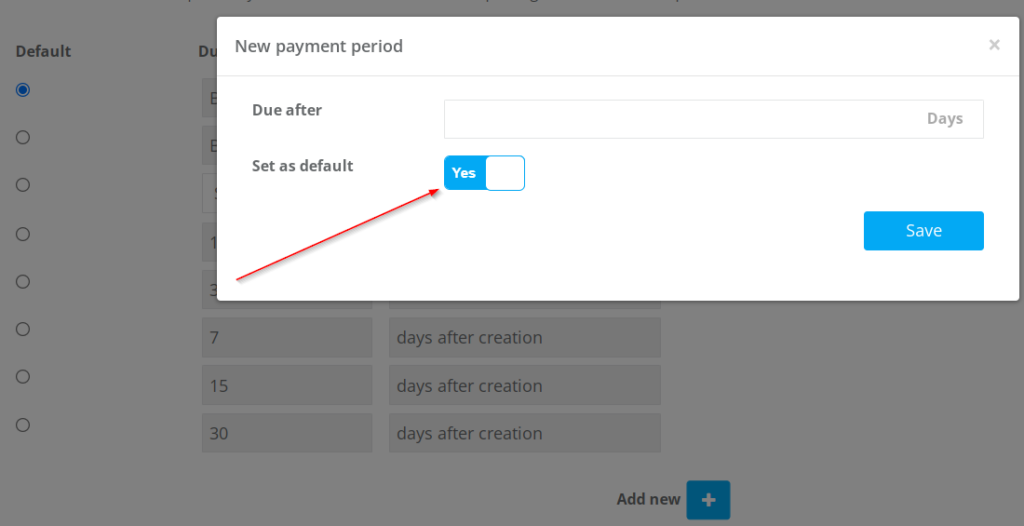
How to customize a new due date
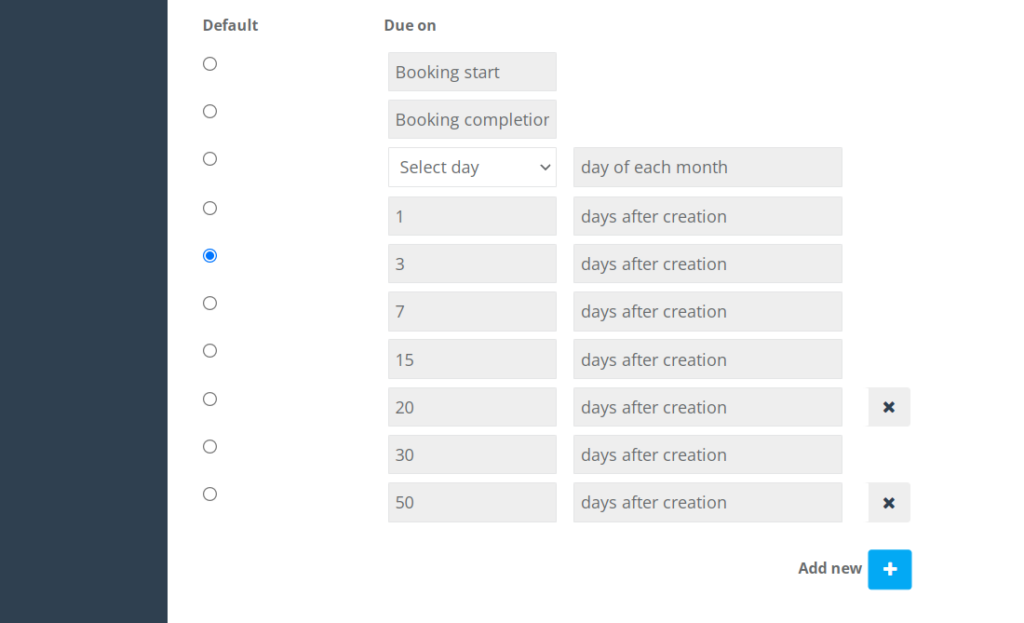
You can also customize new due dates other than the previously mentioned options “1,3,7,15,30” by following the next steps:
Click on “Add new +” under the “Due on” list.
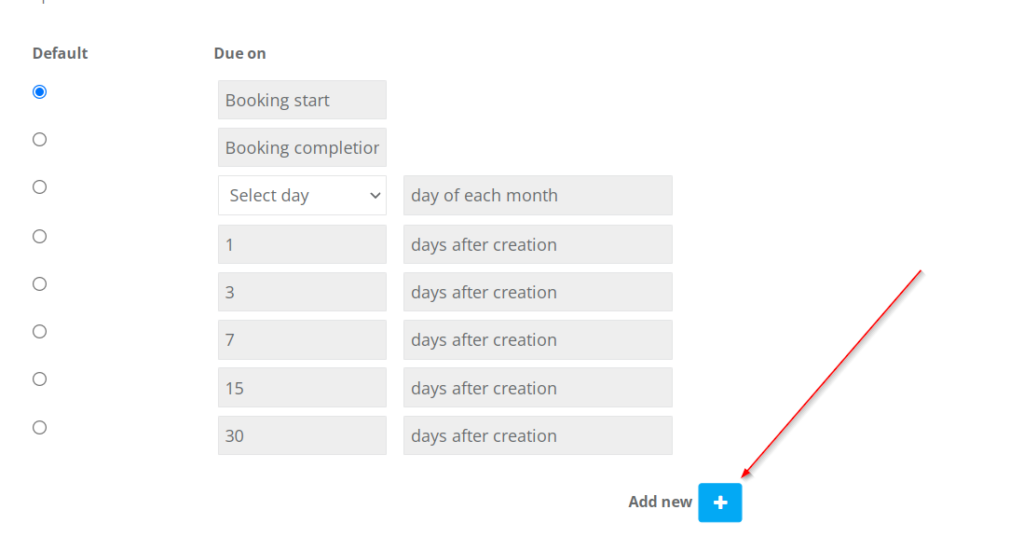
“New payment period” window will appear.
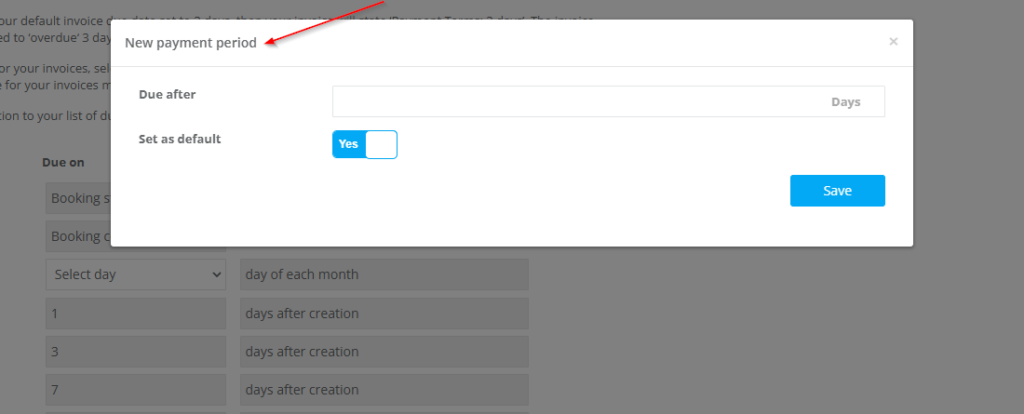
Set the number of days you want in the “Due after” Field.
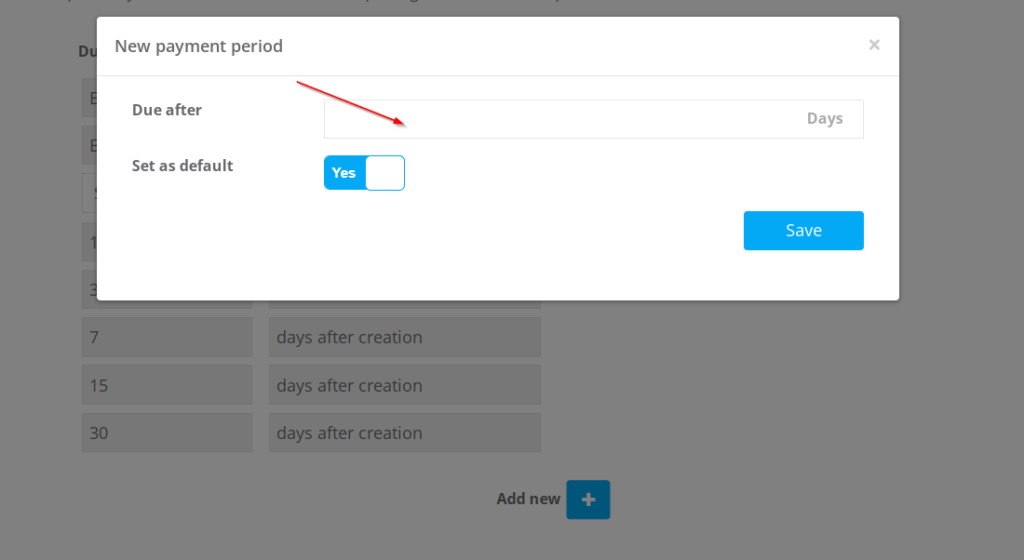
Select “Yes” or “No” to the “set as default” radio button, Yes will make the due date default for this invoice and No will just add the new number as one of the due on options so you can select it later.
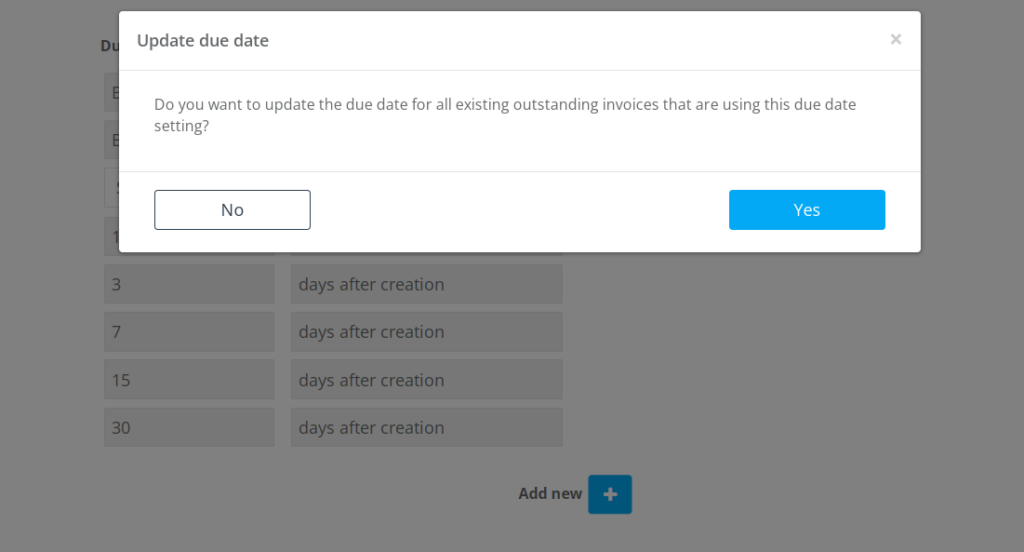
*Please note that you will get a confirmation message after selecting any due date asking if you want to update the due date for all existing outstanding invoices that are using this due date setting and you can click on the “Yes, No” options*
For more information please visit Octopuspro user guide, and subscribe to our youtube channel.